AWS Cloudformation to create AWS VPC
This blog will build AWS Virtual Private Cloud (VPC) creation using AWS Cloudformation template, step by step. However, it is necessary to plan your network with Classless Inter-Domain Routing (CIDR).
Simplest VPC
Here this simplest workable CFN:
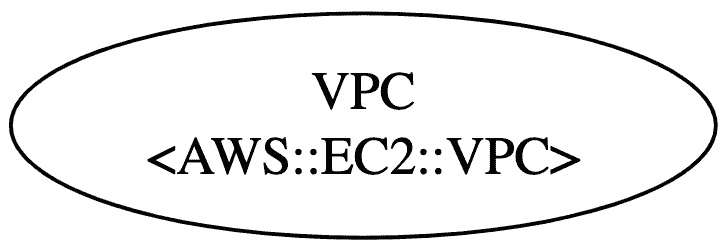
This creates only the VPC, as shown in the above diagram.
AWSTemplateFormatVersion: "2010-09-09"
Description: My VPC example
Parameters:
  EnvironmentName:
    Description: prefix for the resources
    Type: String
    Default: oj-test

Resources:
  VPC:
    Type: AWS::EC2::VPC
    Properties:
      CidrBlock: 10.192.0.0/24
      EnableDnsSupport: true
      EnableDnsHostnames: true
      Tags:
        - Key: Name
          Value: !Ref EnvironmentName
As shown in the CFN, the CIDR block is the same as Network Address Block in Fig 2.
To create the stack
aws cloudformation create-stack --template-body file://test.yaml --stack-name oj-test-stack
To delete the stack:
aws cloudformation delete-stack --stack-name oj-test-stack
Planning
Using Subnet Calculator Site24x71, you can plan and size the subnets as follows. Each subnet, following addresses are already allocated and not available to general use:
- Starting address is Network Address (Eg: 10.192.0.0)
- Second address (Network+1) address is allocated for VPC Router (Eg: 10.192.0.1)
- Third address (Network+2) is reserved for DNS (Eg: 10.192.0.2)
- Fourth address (Network+3) is reserved for future use (Eg: 10.192.0.3)
- Broadcast is the last address (Eg: 10.192.0.127)
I am going to have two public subnets (Subnet ID 1 and 2) and two private subnets.
To create above infrastructure:
AWSTemplateFormatVersion: "2010-09-09"
Description: My VPC example
Parameters:
  EnvironmentName:
    Description: prefix for the resources
    Type: String
    Default: oj-test

Resources:
  VPC:
    Type: AWS::EC2::VPC
    Properties:
      CidrBlock: 10.192.0.0/24
      EnableDnsSupport: true
      EnableDnsHostnames: true
      Tags:
        - Key: Name
          Value: !Ref EnvironmentName

  PublicSubnet1:
    Type: AWS::EC2::Subnet
    Properties:
      CidrBlock: 10.192.0.0/26
      VpcId: !Ref VPC
      AvailabilityZone: !Select [0, !GetAZs '']
      MapPublicIpOnLaunch: true
      Tags:
        - Key: Name
          Value:  !Sub ${EnvironmentName} Public Subnet (AZ0)

  PublicSubnet2:
    Type: AWS::EC2::Subnet
    Properties:
      CidrBlock: 10.192.0.64/26
      VpcId: !Ref VPC
      AvailabilityZone: !Select [1, !GetAZs '']
      MapPublicIpOnLaunch: true
      Tags:
        - Key: Name
          Value:  !Sub ${EnvironmentName} Public Subnet (AZ1)

  PrivateSubnet1:
      Type: AWS::EC2::Subnet
      Properties:
        CidrBlock: 10.192.0.128/26
        VpcId: !Ref VPC
        AvailabilityZone: !Select [0, !GetAZs '']
        MapPublicIpOnLaunch: false
        Tags:
          - Key: Name
            Value:  !Sub ${EnvironmentName} Private Subnet (AZ0)

  PrivateSubnet2:
      Type: AWS::EC2::Subnet
      Properties:
        CidrBlock: 10.192.0.192/26
        VpcId: !Ref VPC
        AvailabilityZone: !Select [1, !GetAZs '']
        MapPublicIpOnLaunch: false
        Tags:
          - Key: Name
            Value:  !Sub ${EnvironmentName} Private Subnet (AZ1)
This is what it creates after the stack created:
If you are interested to enable IPv6 CIDR as follows:
AWSTemplateFormatVersion: "2010-09-09"
Description: My VPC example
Parameters:
  EnvironmentName:
    Description: prefix for the resources
    Type: String
    Default: oj-test

Resources:
  VPC:
    Type: AWS::EC2::VPC
    Properties:
      CidrBlock: 10.192.0.0/24
      EnableDnsSupport: true
      EnableDnsHostnames: true
      InstanceTenancy: default
      Tags:
        - Key: Name
          Value: !Ref EnvironmentName

  IPv6Cidr:
    Type: AWS::EC2::VPCCidrBlock
    Properties:
      VpcId: !Ref VPC
      AmazonProvidedIpv6CidrBlock: true

  PublicSubnet1:
    Type: AWS::EC2::Subnet
    Properties:
      CidrBlock: 10.192.0.0/26
      Ipv6CidrBlock:
        Fn::Sub:
          - "${VpcPart}${SubnetPart}"
          - SubnetPart: '00::/64'
            VpcPart: !Select [0, !Split ['00::/56', !Select [0, !GetAtt VPC.Ipv6CidrBlocks]]]
      VpcId: !Ref VPC
      AvailabilityZone: !Select [0, !GetAZs '']
      AssignIpv6AddressOnCreation: true
      Tags:
        - Key: Name
          Value:  !Sub ${EnvironmentName} Public Subnet (AZ0)

  PublicSubnet2:
    Type: AWS::EC2::Subnet
    Properties:
      CidrBlock: 10.192.0.64/26
      Ipv6CidrBlock:
        Fn::Sub:
          - "${VpcPart}${SubnetPart}"
          - SubnetPart: '01::/64'
            VpcPart: !Select [0, !Split ['00::/56', !Select [0, !GetAtt VPC.Ipv6CidrBlocks]]]
      VpcId: !Ref VPC
      AvailabilityZone: !Select [1, !GetAZs '']
      AssignIpv6AddressOnCreation: true
      Tags:
        - Key: Name
          Value:  !Sub ${EnvironmentName} Public Subnet (AZ1)

  PrivateSubnet1:
    Type: AWS::EC2::Subnet
    Properties:
      CidrBlock: 10.192.0.128/26
      Ipv6CidrBlock:
        Fn::Sub:
          - "${VpcPart}${SubnetPart}"
          - SubnetPart: '02::/64'
            VpcPart: !Select [0, !Split ['00::/56', !Select [0, !GetAtt VPC.Ipv6CidrBlocks]]]
      VpcId: !Ref VPC
      AvailabilityZone: !Select [0, !GetAZs '']
      AssignIpv6AddressOnCreation: true
      Tags:
        - Key: Name
          Value:  !Sub ${EnvironmentName} Private Subnet (AZ0)

  PrivateSubnet2:
    Type: AWS::EC2::Subnet
    Properties:
      CidrBlock: 10.192.0.192/26
      Ipv6CidrBlock:
        Fn::Sub:
          - "${VpcPart}${SubnetPart}"
          - SubnetPart: '03::/64'
            VpcPart: !Select [0, !Split ['00::/56', !Select [0, !GetAtt VPC.Ipv6CidrBlocks]]]
      VpcId: !Ref VPC
      AvailabilityZone: !Select [1, !GetAZs '']
      AssignIpv6AddressOnCreation: true
      Tags:
        - Key: Name
          Value:  !Sub ${EnvironmentName} Private Subnet (AZ1)
Attach AWS Internet Gateway and Route Table
AWS Subnets are, by default, private. To enable internet access, you have to:
- Create an Internet Gateway (IGW) and attach to the VPC
- Create Route Table (RT) within the VPC with routes to outside
- Default public route for IPv6 route
0.0.0.0/0 - Default public route for IPv6 Route
::/0
- Default public route for IPv6 route
- Attache RT to Subnets which is supposed to be public
- Auto-assign IPv4
The template is
AWSTemplateFormatVersion: "2010-09-09"
Description: My VPC example
Parameters:
  EnvironmentName:
    Description: prefix for the resources
    Type: String
    Default: oj-test

Resources:
  VPC:
    Type: AWS::EC2::VPC
    Properties:
      CidrBlock: 10.192.0.0/24
      EnableDnsSupport: true
      EnableDnsHostnames: true
      InstanceTenancy: default
      Tags:
        - Key: Name
          Value: !Ref EnvironmentName

  IPv6Cidr:
    Type: AWS::EC2::VPCCidrBlock
    Properties:
      VpcId: !Ref VPC
      AmazonProvidedIpv6CidrBlock: true

  PublicSubnet1:
    Type: AWS::EC2::Subnet
    Properties:
      CidrBlock: 10.192.0.0/26
      Ipv6CidrBlock:
        Fn::Sub:
          - "${VpcPart}${SubnetPart}"
          - SubnetPart: '00::/64'
            VpcPart: !Select [0, !Split ['00::/56', !Select [0, !GetAtt VPC.Ipv6CidrBlocks]]]
      VpcId: !Ref VPC
      AvailabilityZone: !Select [0, !GetAZs '']
      # AssignIpv6AddressOnCreation: true
      MapPublicIpOnLaunch: true
      Tags:
        - Key: Name
          Value:  !Sub ${EnvironmentName} Public Subnet (AZ0)

  PublicSubnet2:
    Type: AWS::EC2::Subnet
    Properties:
      CidrBlock: 10.192.0.64/26
      Ipv6CidrBlock:
        Fn::Sub:
          - "${VpcPart}${SubnetPart}"
          - SubnetPart: '01::/64'
            VpcPart: !Select [0, !Split ['00::/56', !Select [0, !GetAtt VPC.Ipv6CidrBlocks]]]
      VpcId: !Ref VPC
      AvailabilityZone: !Select [1, !GetAZs '']
      # AssignIpv6AddressOnCreation: true
      MapPublicIpOnLaunch: true
      Tags:
        - Key: Name
          Value:  !Sub ${EnvironmentName} Public Subnet (AZ1)

  PrivateSubnet1:
    Type: AWS::EC2::Subnet
    Properties:
      CidrBlock: 10.192.0.128/26
      Ipv6CidrBlock:
        Fn::Sub:
          - "${VpcPart}${SubnetPart}"
          - SubnetPart: '02::/64'
            VpcPart: !Select [0, !Split ['00::/56', !Select [0, !GetAtt VPC.Ipv6CidrBlocks]]]
      VpcId: !Ref VPC
      AvailabilityZone: !Select [0, !GetAZs '']
      AssignIpv6AddressOnCreation: true
      Tags:
        - Key: Name
          Value:  !Sub ${EnvironmentName} Private Subnet (AZ0)

  PrivateSubnet2:
    Type: AWS::EC2::Subnet
    Properties:
      CidrBlock: 10.192.0.192/26
      Ipv6CidrBlock:
        Fn::Sub:
          - "${VpcPart}${SubnetPart}"
          - SubnetPart: '03::/64'
            VpcPart: !Select [0, !Split ['00::/56', !Select [0, !GetAtt VPC.Ipv6CidrBlocks]]]
      VpcId: !Ref VPC
      AvailabilityZone: !Select [1, !GetAZs '']
      AssignIpv6AddressOnCreation: true
      Tags:
        - Key: Name
          Value:  !Sub ${EnvironmentName} Private Subnet (AZ1)

  IGW:
    Type: AWS::EC2::InternetGateway
    Properties:
      Tags:
        - Key: Name
          Value: !Ref EnvironmentName

  IGWAttachment:
    Type: AWS::EC2::VPCGatewayAttachment
    Properties:
      VpcId: !Ref VPC
      InternetGatewayId: !Ref IGW

  RT:
    Type: AWS::EC2::RouteTable
    Properties:
      VpcId: !Ref VPC
      Tags:
        - Key: Name
          Value: !Sub ${EnvironmentName} Public Routes

  DefaultPublicRoutes:
    Type: AWS::EC2::Route
    DependsOn: IGWAttachment
    Properties:
      RouteTableId: !Ref RT
      DestinationCidrBlock: 0.0.0.0/0
      GatewayId: !Ref IGW

  PublicSub1NetRTAssociation:
    Type: AWS::EC2::SubnetRouteTableAssociation
    Properties:
      RouteTableId: !Ref RT
      SubnetId: !Ref PublicSubnet1

  PublicSub2NetRTAssociation:
    Type: AWS::EC2::SubnetRouteTableAssociation
    Properties:
      RouteTableId: !Ref RT
      SubnetId: !Ref PublicSubnet2
Testing the VPC
You can create an EC2 instances in public subnet (bastion=jumpbox) and and private subnet and test both subnets using SSH port forwarding to private instance via bastion.
In your local machine (in my case MacOs), you have to verify the permission is 400 of your SSH key use to connect to the bastion. In the MacOS:
stat -f "%OLp" ~/mykey.pem
Verify the SSH-agent is running. In the MacOS:
eval `ssh-agent`
which should give you a process PID.
Add the key to the SSH-agent:
ssh-add -K ~/mykey.pem
Using agent you can connect to the instance (same AZ where bastion is located) in the private subnet. First create a bastion host in the public subnet of the selected AZ.
-
Connect to the bastion:
ssh -A -i "mykey.pem" ec2-user@ec2-.-..-...-173.compute-1.amazonaws.comThe option
-Ais for agent access and you don't need to specify the location of the key file in the MacOs. -
Check the internet connectivity of the bastion by ping:
ping 1.1.1.1This should return the 64 bytes continuously.
-
Inside the bastion, connect to the instance in the private subnet using private address of that instance. This is where SSH agent help you.
ssh ec2-user@10.192.0.234 -
if you ping, this private instance not return any bytes because it doesn't have any access to internet.


Comments
Post a Comment
commented your blog