How to create step guides
Flow to create step guide
Most of the bloggers need to add stories to their blog posts. For tech bloggers, that is most probably the journey of clicks over browser, application and so on. However, the blogger has to capture the screen and record with the annotations. In this blog, I explain how to create step by step guide:
graph TD
  A[Start walk through] --> B(Take screenshot)
  B --> C{more to go ?}
  C -->|Yes| B
  C -->|No| D[Annotate Screenshot]
  D --> E{more to annotate ?}
    E -->|Yes| D
  E -->|No| F[Create Guide]
As shown in the above Flow chart, you have to annotate all the screenshots first, as explained in the below section. In the end, you have to add those screenshot to the editor like Typora Typora. You can use uPic integration of Typora to auto-upload pictures to cloud. You can write a complete step by step guide in the Typora.
Screen annotation in Mac
Step 1: Press Cmd + Shift + 5, that will open the following.

Step2: From the Fig 1, you can click the Options, and configure as you want. For example, I select "Preview" and "None" for the second to wait before taking the picture as shown in Fig 2.

Step 3: The next option is to select the area want to capture. For example, you can select fullscreen, selected portion of the screen or particular window as shown in Fig 3.

Step 4: When you click "Capture" (shown in Fig 4). A screenshot will be opened in Preview as in Fig 5.

Step 5: Now you can modify the screenshot as you want, as shown in Fig 5.

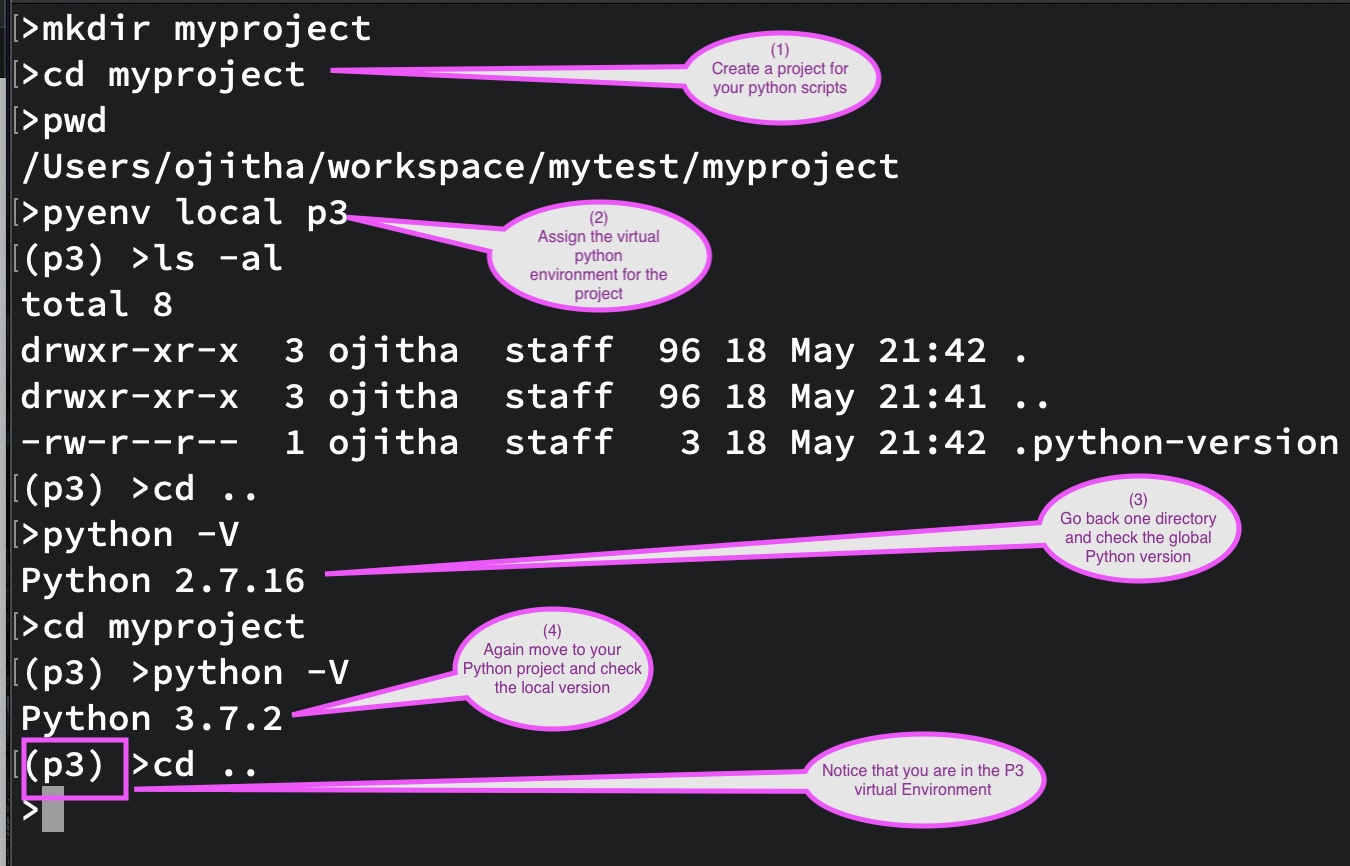
For example, you can create something similar to the following
In the Mac, you are creating PNG files for screenshots as default file type. If you want to change the file type, please read MAC shortcuts. However, I have created the above screenshots using Folge, which is in the beat version. In the windows you can use PSR. In the unix you can use XSR.
If you are a blog writer, I would like to recommend you to read about Toolbox for bloggers.


Comments
Post a Comment
commented your blog